3 Ways to Get the Scale Moving

Do you want the scale to move – and MOVE NOW!?  Here’s 3 ways to get the scale moving in the right direction, RIGHT NOW! 

  1. Start with Nutrition.  Most people think that working out is what they need to do right away to get the scale moving.  And yet, truthfully, food is where you can see the most results.  80% diet and 20% working out is a great rule to follow.  You can’t out-train a poor diet – it’s impossible!  So starting in the kitchen is a huge key to your overall success and getting the scale moving in the right direction (no matter what direction that may be). I also highly recommend tracking your food. What get’s measured get’s improved – right?  I’m unsure of who said this, but – they are right!  Even if you don’t want to use a tracking app, simply writing down what you eat in a day can be a very eye opening experience.  But, overall – food is key in overall health and fitness goals.  This is a foundation when it comes to getting results. 
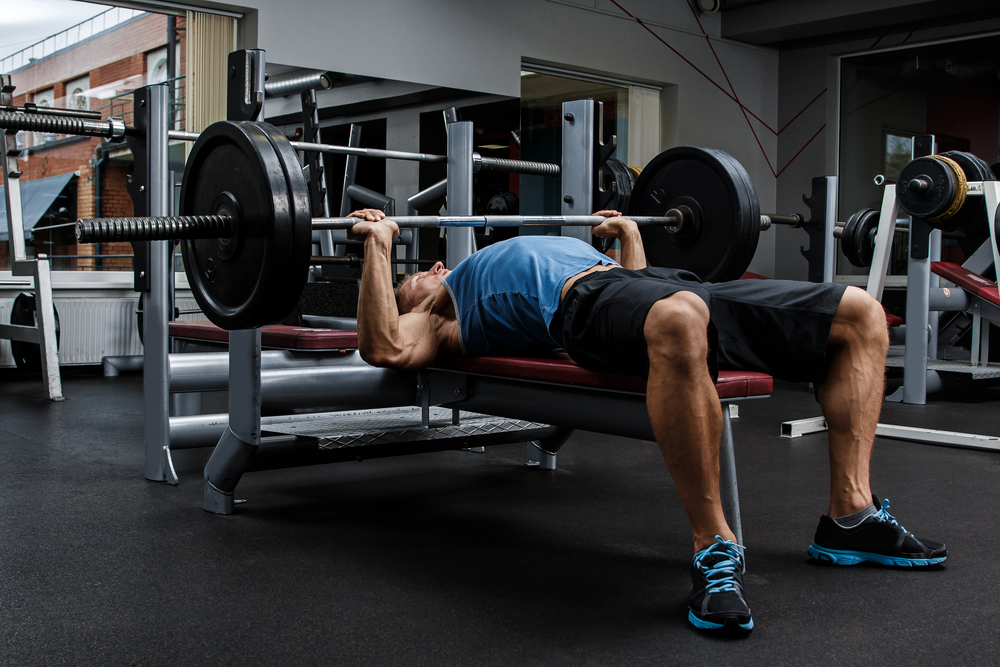
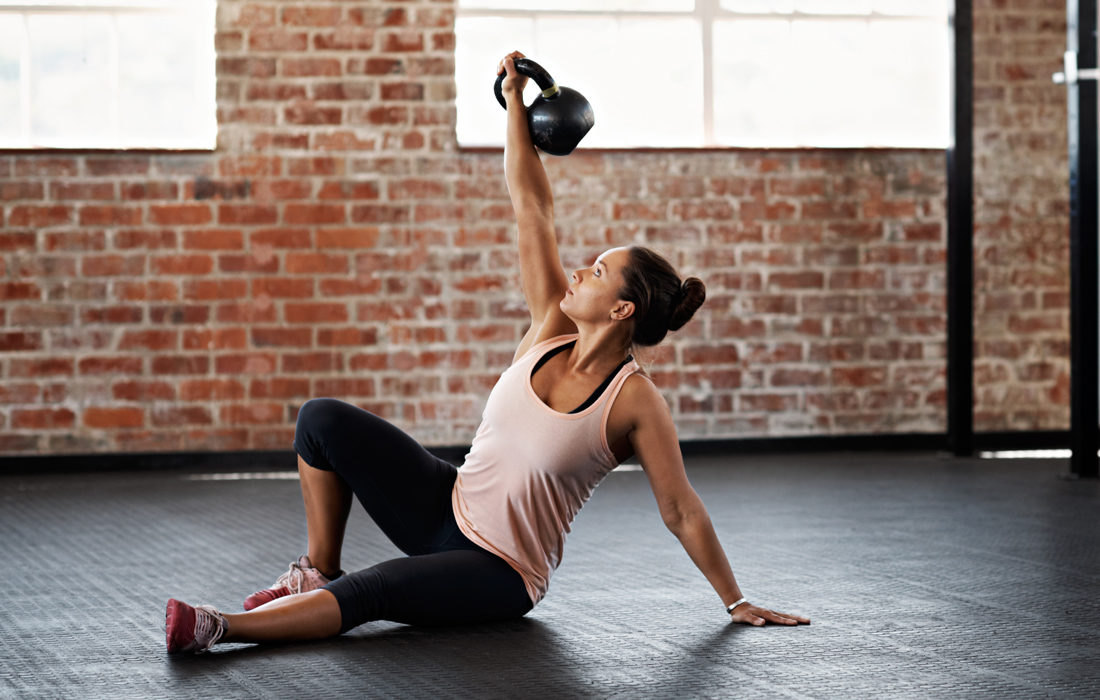
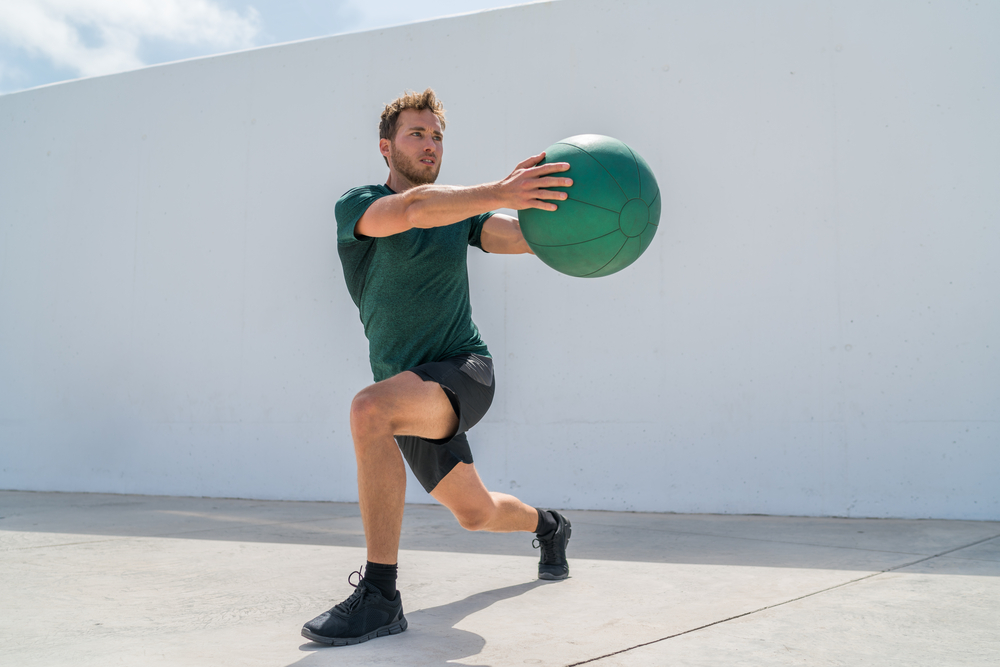
  2. Comprehensive Programming.  Now, let’s get to the working out part. There is a strategic and science-based way to optimally train when it comes to working out.  It’s not one size fits all.  Find something that first, interests you and keeps you interested and also, that works for you!  If you need help in this area – we have your back!  We offer custom comprehensive programming.  If you are interested in this – please reach out to us and we’d be happy to help in any way that we can! 
  3. Find a Plan that’s for YOU.  Again, it’s not one size fits all.  The best plan for you is the one that you will stick with – for a LIFETIME.  We truly believe in making health and wellness a lifestyle because that is the only way you will get results and maintain those results.  In addition, there are so many positive benefits to living a healthy lifestyle.  This does not mean you need to restrict, restrict, restrict.  That’s only going to cause you to binge and restrict again and get stuck in that cycle.  Not to mention, you’ll be miserable every time your restricting!  Nobody wants that.  It’s finding what works best in your life.

If you are looking to get started on your healthy lifestyle, contact us!  We’d be happy to help you find a nutrition plan and workout plan that works for you.  


Why You Should Be Doing More Core Stability Exercises

Stabilization exercises were formerly the realm of the physical therapist. Strength and conditioning coaches and fitness professionals are now starting to value the importance of the torso muscles as stabilizers. Lumbar stabilization has been utilized in the physical therapy community for years to treat low back dysfunction but recently fitness professionals view stabilization as a preventative measure for any athlete and a way to enhance all areas of fitness.

What is The Primary Function of The Torso?

Our torso is made up of a group of muscles that primarily function to prevent unwanted movement during day-to-day activities, working out, or sport participation. To prevent unwanted movement, our torso has to stabilize joints. The lumbar spine and pelvis in particular, are the most important.  Functional training is the most effective way to call on your torso to enhance core stability.

Benefits of Core Stability Exercises?

A strong core enhances balance, stability, and energy transfer. Thus, it can help prevent injuries during day-to-day activities and sports injuries. Core strength directly correlates to exercise and sport activities like walking, jogging, sprinting, throwing, squatting, jumping, and swinging motions. The stronger your core is, the more efficient you will be at these activities. Through strengthening your core, you will see an increase in your performance as well as minimize your risk for injuries.

Implementation

In any sound program their should be at least one core stability exercise in each workout. There are thousands of effective core  stability exercise, some are more effective than others. The primary thing that you want to consider is your pelvic positioning. This is crucial for proper alignment to maximize muscle recruitment and activation. Your pelvis has the capacity to tip forward or back, depending both on your inherent structure and day-to-day activities. Extreme tipping one way or the other can create problems over time, so can lack of mobility of the pelvis. Your core muscles are the ones that regulate both how much movement is possible between the pelvis and the lumbar spine and where the position of your pelvis will end up on that spectrum. So we use our core musculature to consciously control the position of the pelvis during movement to train the body not to go into extremes.


The World’s Best Vertical Jump Exercise

The World’s Best Vertical Jump Exercise

So, you have probably heard, the best way to improve your vertical jump is by doing plyometric training. This type of training includes ballistic hops, skips, and jumps that enhance the stretch shortening cycle (SSC) in your tendons, and in particular, your golgi tendon organ (GTO). The GTO is a proprioceptive sensory receptor organ that senses changes in muscle tension. It lies at the origin and insertion of skeletal muscle fibers into the tendonsof skeletal muscle. When there is tension placed on your muscles or tendons from lifting weights or landing from a jump, for example, the GTO sends signals to inhibit the muscle from exerting too much force as a safety mechanism. This is important as it ensures you don’t strain or tear a muscle. However, structured plyometric training can inhibit or desensitize the GTO to allow your muscles and tendons to harness more kinetic energy thus giving you the ability to produce more force and power in your jumps.

Depth Drop to Box Jump Trumps Them All

The depth drop to box jump is the most effective jump training that you can do because it inhibits the GTO with the deficit drop landing. The other mechanism that makes this drill effective is that it not only has a shock method but also effectively trains all three kinds of muscle contractions. These include eccentric, isometric, and concentric muscle contractions. Training all three phases will enhance intramuscular coordination which will allow you to jump higher and get off the ground faster.

How to Do This Drill

Landing– Reach out with one foot with your toes pointing up. This is calleddorsi flexion.Step off the box and land on both feet simultaneously applying pressure through the middle of your foot. You don’t want to land on your toes or your heels. Next, focus on sinking your hips back and positioning your chest over your thighs or knees while swinging both arms back. If you look at the video, notice that when I land, both arms are being pulled down and back so there is no wasted movement. This will make the transition faster so you can get off the ground quicker! For beginners, pause on the landing to ensure good mechanics and posture. As you progress, decrease ground contact time.

Transition– This phase of the jump is all about joint stiffness. As soon as your feet hit the ground, don’t allow your hips to continue dropping toward the ground. To avoid this, think about landing like a brick hitting the floor versus a slinky. This shock mechanism will help you improve the rate of force absorption allowing you to transition into your take off quicker.

Take Off– This is the part of the drill that everyone emphasizes. However, if the landing and transition are not efficient or done properly, the opportunity for an explosive take off will be minimized. To decrease your take off time and increase your jump height, push through the ground swinging your arms forward and upward. Think about driving through your big toe and rapidly extending your hips to get triple extension.

If you emphasize each aspect of the depth drop (landing, transition, and take off), you will notice more pop off the ground and increase your vertical jump height.

Program Implementation

After doing a proper warm up, you can include the depth drop to box jump drill before your strength training routine or superset with a compound lower body exercise like squats. When doing plyometrics drills, you want to focus on quality not quantity so keep the reps low and gradually increase the volume by adding more sets as your training progresses.

Week 1-2: 2×5

Week 3-4: 3×4

Week 5-6: 4×4


The Number One Exercise to Increase Your Upper Body Strength

The Number One Exercise to Increase Your Upper Body Strength

Are you looking to increase your upper body strength? There are tons of exercises out there that can help improve your strength. But there is one that is above the rest. That is, the bench press. This is the number one exercise to increase your upper body strength. You can spend hours in the gym doing countless reps of push-ups, pull-ups, shoulder presses, and bicep curls, but none of these single exercises will have as much of a positive effect on your upper body strength than the bench press. Let’s dive in to see why the bench press is the best exercise for building strength!

Bench Press for Gains

The bench press is the number one exercise to increase your upper body strength because it gives you the most bang for your buck. It allows you to recruit more muscle fibers than any other upper body exercise out there. When it comes to building strength, you want to stick to exercises that use major muscle groups when exerting sub-maximal and maximal effort to get the gains you are looking for.

The bench press is a compound exercise, meaning it utilizes multiple joints and muscle groups to help you develop functional strength by following your body’s natural movement patterns. Compound movements are among the best exercises to gain total upper body strength because they help you develop the greatest amount of muscle tissue possible. Compound lifts create the greatest change in body composition in the shortest time and also have the added benefit of helping develop the body proportionately.

Heavy Weight Champ

Gaining upper body strength requires exercises that stimulate muscular growth by imposing enough stress on your muscles. The bench press is the number one exercise to increase your upper body strength because it allows you to contract your muscles against heavier loads, which exhaust your muscles with fewer repetitions. The bench press maximizes damage to contractile proteins in your muscles. Your muscles adapt by repairing the damage and synthesizing more proteins, which effectively increases the contractile strength of your muscles.

Is the Bench Press Right for You?

If you’re looking to increase your upper body strength while improving muscle definition and posture, the bench press is the way to go. However, if you have shoulder issues or any other pain in your back, elbows, or wrist, you may want to stick to exercises that work on stability and control to help strengthen that area or prevent further injury. A great alternative to the bench press is the dumbbell bench press or push-up. These upper body exercises have great benefits but do not put as much stress on your joints. Remember to train mobility and stability, then endurance, then build strength. Failure to follow this progression will result in injury. Also, be sure to incorporate these warm-up exercises before doing any upper body strength routine.

1×10 Each


How to Do a Turkish Get-Up

How to Do a Turkish Get-Up

The Turkish Get-Up is an exercise that dates back to ancient wrestlers in what is now Turkey to prepare themselves for competitions. This is a great ancient exercise with present day benefits. The Turkish Get-Up is a total body exercise that increases strength, stability, mobility, balance and coordination. It can be used in a warm-up, as an assessment of overall strength and mobility, and within a strength-training program. The Get-Up is generally performed with a kettlebell, but can also be used with a dumbbell. The Get-Up is a complex movement that requires coordination in order to execute properly, but the benefits of this exercise are well worth it.

Here are a few benefits of the Turkish Get-Up

  • Single leg hip stability during the initial roll to press and during the bridge
  • Shoulder stability
  • Incorporates all three planes of movement
  • Thoracic extension and rotation
  • Hip and leg mobility and active flexibility
  • Stability in two different leg patterns – lunge stance as well as squat stance
  • Both rotary and linear stability
  • Ankle mobility
  • The ability to link movement created in our extremities to the rest of our body

Step-by-step guide on how to properly execute the Turkish Get-Up

  1. Starting position – Lie on your back with kettlebell or dumbbell in your right hand – straight up in the air. Right knee will be bent with foot planted firmly on the ground and the left leg is straight on the ground. Left arm is straight on the ground, at a 45 degree angle.
  2. Elbow – With your right foot being firmly on the ground, roll onto your left elbow, with weight still above head.
  3. Hand – Once you have shifted weight to the elbow, continue rolling up until your weight is supported in your left hand. You should have 3 support points – left hand, left glute, and right foot.
  4. Bridge – Lift your hips off the ground keeping your right arm extended straight overhead, and your weight in your left hand. Keep looking up at the weight and keep it overhead.  You should have 2 support points – left hand and right foot.
  5. Leg Swing – With hips still lifted in the bridge, swing your left leg under your body, and place your knee on the ground underneath you.
  6. Kneel – Take your left hand off of the floor and straighten up so your body is upright. Turn your legs so that they are parallel to each other.
  7. Stand up – Drive your back foot through your hips and into your front foot, stand up from the lunge – keeping the weight straight overhead and look at the weight.
  8. Reverse Lunge – Keep the weight overhead, and step your left foot back in a reverse lunge, lowering your knee to the ground – with legs parallel.
  9. Lowering Hand – Swinging hips, lower left hand down to the ground.
  10. Swing leg – Now that your hand is on the ground, swing your left leg back to the front of you – with your weight in your left heel, left hand, and right foot.
  11. Elbow – Lower your weight back to your elbow – with contact points being your left elbow, left butt cheek and right foot.
  12. Finish – Lower your torso down to the ground and end in the beginning position.

The Turkish Get-Up can be modified for beginners and people dealing with injuries. Possible modifications would be to lighten the weight, no weight, Stage 1 Get-Up, or Stage 2 Get-Up.

Stage 1 Get-Up


Stage 2 Get-Up


Which is Better, Back Squat or Front Squat?

Which is Better, Back Squat or Front Squat?

Why Squatting is Important

The squat is a vital, natural, and functional component of your being. In the bottom position, the squat is nature’s intended sitting posture. Only in the industrialized world do we find the need for chairs, couches, benches, and stools. This comes at a loss of functionality that contributes immensely to decrepitude. “If you don’t use it, you lose it.” We see this far too often in today’s modern society. This non-usage of our bodies through all ranges of motion cause weak glutes and hamstrings which, in turn, causes improper squat form through poor engagement, weak control, or lack of awareness in the glutes and hamstrings.

Which is Better, Front Squat or Back Squat?

Most importantly, an athlete’s mobility should determine which lift is better suited to him or her. If you can safely perform one lift and not the other, the choice is apparent. The proper mobility at the shoulder, upper and lower back, hips, knees and ankles plays a huge part in the optimal squat type for an individual as they slightly differ from one another.

Front Squats require significantly more mobility than Back Squats. You need excellent thoracic spine mobility to keep your chest up, outstanding wrist flexibility and shoulder mobility to rack the bar, superb hip and groin mobility to squat low with your knees in line with your toes, and great range of motion (ROM) through the ankles to keep your lower back from rounding. One pro to front squats is the ability to protect the shoulders more by using the clean grip or cross arm grip. I would recommend the front squat to individuals that are trying to increase their olympic lifts, such as cleans and snatches, as the grip carries over to the receiving phase in these movements.

Back squats focus more on the hips, glutes, and lower back, which is great training for movements that require hip extension. Another favorable aspect of back squats is the ability to add more load (weight) to the movement, which in turn adds to more overall strength throughout the body, specifically in the core.

Win-Win Collaboration

Back squats and front squats differ in their positioning and targeted muscles; however, there are benefits to both variations. When used in conjunction with one another, these two exercises can reap huge benefits for the athlete and elevate performance. Unless you are an overhead athlete or have lower-body injury/mobility issues, front squats and back squats are imperative to your lifting program, especially if you are training your lower body twice a week.

By: Tandy Juell

Performance Coach


Enhance Your Mobility With This 5 Minute Routine

Mobility Series

Flexibility

Flexibility is the absolute range of motion in a joint or system of joints, and the length of muscle that crosses the joint involved. It directly correlates with range of motion and mobility.  Range of motion is the distance and direction the joint can move, while mobility is the ability to move without restriction.

Mobility

Even though mobility and flexibility sound similar they are slightly different. Mobility within a joint is the degree to which the area where two bones meet (known as an articulation) is allowed to move without being restricted by the surrounding tissue such as tendons, muscle, and ligaments. Think of mobility as the range of motion around the joint.

A good level of mobility allows a person to perform movements without restriction, while a person with good flexibility may not have the strength, coordination, or balance to execute the same movement. Good mobility does not always mean good flexibility.

Benefits of Increasing Your Mobility

  • Increased range of motion for increased strength potential.
  • More muscle activation.
  • Decreased risk of injury.
  • Decreased soreness and joint pain.
  • More fluid movements.

Try This Mobility Routine Performing Each Exercise for 30 Seconds

Foam Roll: Back

Foam Roll: Back Side to Side

Foam Roll: Glute

Foam Roll: Hamstring

Foam Roll: IT Band

Foam Roll: Quad

Foam Roll: Adductors

T-Spine Lunge

Leg Swings

Lying Knee Hugs

Side Lying T-Spine Rotation


Advance Your Core Training with The Sling System

Advance Your Core Training
with The Sling System

The core is the foundation of your body. It links everything together and provides stability for athletic skills. So simply doing a few Sit-Ups or even Planks won’t cut it when developing an athletic core. The key is developing what is called the sling system. The sling is a group of contralateral (opposite) muscle groups that work in a diagonal fashion and that lie on the anterior (front) and posterior (back) portion of the trunk. The sling can be broken down into the posterior and anterior oblique slings. The primary function of the sling is to stabilize the pelvis and spine during movement, which enhances performance in all sports from track and field, football, baseball, golf and volleyball.

Anterior Oblique System

The anterior oblique sling system includes the external and internal oblique, opposing leg adductors complex, and hip external rotators. The oblique plays a key role in mobilizing and stabilizing gait. It functions by pulling the leg through during the swing phase. Athletic movements involve many moving parts. The anterior sling system helps stabilize the pelvis and spine during acceleration, deceleration and multi-directional movements. The anterior oblique system contributes to rotational forces and hip flexion and stabilizes the lumbo-pelvic-hip complex.

Here’s how to train it:

Posterior Oblique System

This system includes the gluteus maximus, latissimus dorsi and thoracolumbar fascia. The glute max and lat attach to the thoracolumbar fascia, which connects to the sacrum. Their fibers run perpendicular to the hip joint so when the opposite glute max and lat contract, the tension built up stabilizes that hip joint, enhancing energy transfer.

The posterior oblique subsystem contributes to propulsion when we walk, run or sprint. It is also a key contributor to rotational forces such as swinging a golf club or baseball bat, or throwing a ball. If there is any dysfunction in the posterior oblique subsystem, the hip joint will become unstable, leading to back pain. Someone with weak glutes and/or lats will most likely have a motor unit recruitment dysfunction leading to increased tension in the hamstrings and will be at a higher risk of recurring hamstring strains.

Here’s how to train it:

Take your core training to the next level by incorporating these exercises to optimize performance!


15 Minute High Intensity Lunch Break Circuit

15 Minute High Intensity Lunch Break Circuit

Do you ever feel overwhelmed with too much on your plate? Bombarded with day-to-day tasks at work and at home? We can never seem to fit in everything that needs to get done within 24 hours. For a lot of us, time is enemy number one of our fitness goals. There is a pre-conceived notion that a workout that lasts less than 60 minutes is subpar. This idea has been planted in our brains, and we don’t feel satisfied or accomplished unless we get exactly an X amount of cardio and a Y amount of strength training. Well, for those of you who don’t have the option of dedicating hours at the gym, you can breathe a sigh of relief. Studies show that a quick 10-15 minute workout will earn you great benefits rather than not exercising at all. Take a look at what a short, lunch break circuit can do for you:

According to the Center for Disease Control and Prevention, you can get the same benefits from 2-3 short workouts during the day as you can from a long trip to the gym. Shorter workouts tend to be higher in intensity. This provides greater reward than a moderate intensity, long workout. Studies have shown that HIIT (high intensity-interval training) for 20-30 minutes can produce increased fat loss and muscle development. If you’re stressed with work or your school workload has you feeling down, remember that a mini workout gets your blood flowing to the brain which brings so many benefits (including the motivation to get your work done!).

  • Gain energy
  • Improved mood and reduced stress
  • Headache prevention/relief
  • Better sleeping habits
  • Decrease in depressive feelings
  • Lowered blood pressure
  • So much more!

Consistent, shorter, high intensity workouts have shown to produce great improvements to your cardiovascular health. A study published in the Journal of Strength and Conditioning, states that HIIT types of workouts allow your heart to grow bigger and stronger, which increases your overall fitness capabilities. Your heart learns to perform at a higher capacity and recover quickly. Who doesn’t want a stronger heart?! We all know that it is way easier to find 15-30 minutes in our day, rather than set aside 1-2 hours. Regularly finding those short intervals during the day to complete a mini workout can do wonders for your motivation and consistency. One healthy choice leads to another, so when those healthy choices are painless to make and easy to find, we are motivated to stay on the right track.

Some of you may be wondering, “What in the world can I do on my lunch break or free time in only 15 minutes?” Working out doesn’t have to require dumbbells or machines–your bodyweight will do just fine. Check out the workout below, designed by one of our trainers, to get you started. Feel free to mix it up, which is easy to do during an HIIT exercise, and be creative! Remember this the next time you find yourself struggling or looking for motivation–something is always better than nothing.

15 Minute Lunch Break Circuit

Warm Up

Jump Rope-2 min

*Perform these 3 exercises for 30 seconds each, 2 sets

Body Weight Squats

Push Ups

Sit Ups

*Perform these 3 exercises for 30 seconds each, 2 sets

Dumbbell Alternating Lunge

Plank Ups

Russian Twist

*Perform these 3 exercises for 30 seconds each, 2 sets

Alternating Lateral Lunges

T-Spine Push Up

Penguin

Burpees       (As many as you can in 1 minute)

Always remember to stretch while you cool down, keep those muscles loose and improve your flexibility!

If you enjoyed this workout and you would like to receive personalized workouts on the go right on your smart phone, message us by clicking here to start your 7 day FREE trial of our online personal training program! Risk free, easy to use, and convenient.


How Gut Bacteria Effects Body Function and Performance

How Gut Bacteria Affects Body Function and Performance

Gut health has gained traction in the health and fitness community as more people are aware of dysfunction in their gut health. Food sensitivity awareness has skyrocketed with over 15 million Americans dealing with food allergies. Your gut is the powerhouse of your immune system. It greatly affects your mood, energy level, digestive system, and response to stress. The state of your gut health is determined by the amount of live bacteria you have to allow your gut to function properly. Let’s dig into how gut bacteria affects body function and performance.

What is gut bacteria?

Gut flora is the complex community of microorganisms that live in the digestive tracts of humans and other animals, including insects. The gut metagenome is the aggregate of all the genomes of gut microbiota.

People who take antibiotics and consume highly chlorinated water may be at risk of flora imbalance. The good news is that this can be treated by creating a breeding ground for microflora. The microflora in your body needs a stable environment to grow and flourish. Experts suggest that your ideal colon pH should be between 6.7 and 6.9. A pH of 7 is neutral—anything lower than 7 is acidic and anything above 7 is alkaline. Your colon should be slightly acidic, which decreases the growth of harmful bacteria like E. coli, Shigella, and Salmonella.

Your gut is the powerhouse of your immune system. Roughly 70% of your immune system is found within the gastrointestinal tract. This is why having a balance of flora in your gut is so important to have a healthy immune system. Experts suggest that an imbalance in flora could be the cause of some autoimmune disorders and allergies.

What does gut bacteria do?

Bacteria lines your intestines and help you digest food. During digestion, it makes vitamins that are vital for life, sends signals to the immune system, and makes small molecules that can help your brain work. Gut bacteria plays a key role in our health, from metabolizing food to preventing disease.

Researchers have discovered that people who suffer from disease have a different combination of bacteria that line their intestines compared to healthy individuals. They are still working to define the makeup of gut bacteria in a healthy person versus the gut bacteria that puts you at risk of disease.

Ongoing research reveals that people with certain diseases often have a very different mix of bacteria in their intestines compared to healthier people. Researchers are working to define the makeup of gut bacteria in a healthy person versus the gut bacteria in an unhealthy person that can point to higher risk or presence of certain diseases.

What can you do to restore and maintain a healthy gut?

In order to restore and maintain a healthy gut, you should create an acidic environment for bacteria to thrive. You can do this by consuming probiotics like lactobacillus and bifidobacterium (live bacteria and yeast that are good for your health). There are beverages, supplements, and natural food sources that you can consume as well that are a good source of healthy bacteria.

Foods and supplements that will help you restore gut health 

  1. Fermented Foods
  • Yogurt
  • Natto
  • Kombucha
  • Sauerkraut
  • Pickles
  1. Probiotic supplements – beverages or capsules
  • Flora Protect
  • Culturelle
  • Kavita
  • CoCo Biotic
  • Suja
  1. Lactic Acid Yeast Wafers

How much healthy bacteria should you be consuming?

Experts recommend one to ten billion live cultures split into three doses daily. The National Yogurt Association (NYA) has established a Live & Active Cultures seal program for all yogurt manufacturers whose refrigerated products contain at least 100 million cultures per gram at the time of manufacture, and whose frozen products contain 10 million cultures per gram at the time of manufacture. This level was based on a survey of leading research scientists involved in clinical studies of the health attributes associated with live and active culture yogurt. The seal appears on yogurt packages and indicates whether this level of live and active cultures is present in the product.

Benefits of a healthy gut 

Having a healthy gut has many benefits whether you are an athlete, someone looking to improve your overall health, or someone who frequently takes medication. Here are a few reasons why you should stay on top of your gut health.

  • Powers digestive system
  • Contributes to immune function and health
  • Fights off urinary tract infections
  • Good for cholesterol management
  • Cleansing agent
  • More efficient nutrient absorption
  • Increases stress tolerance
  • Offsets harmful effects of medication

Privacy Settings
We use cookies to enhance your experience while using our website. If you are using our Services via a browser you can restrict, block or remove cookies through your web browser settings. We also use content and scripts from third parties that may use tracking technologies. You can selectively provide your consent below to allow such third party embeds. For complete information about the cookies we use, data we collect and how we process them, please check our Privacy Policy
Youtube
Consent to display content from Youtube
Vimeo
Consent to display content from Vimeo
Google Maps
Consent to display content from Google
Contact us today to learn more about our programs and services!CONTACT US